(→Crash Events: still not finished) |
m (→Crash Events) |
||
| Line 71: | Line 71: | ||
!Goal |
!Goal |
||
!Crashbreaker in |
!Crashbreaker in |
||
| − | !Car |
||
|- |
|- |
||
| rowspan="3"|Cross Traffic |
| rowspan="3"|Cross Traffic |
||
|[[File:B2_Gold.png|20px]] $145,000 |
|[[File:B2_Gold.png|20px]] $145,000 |
||
| rowspan="3"|8 Wrecks |
| rowspan="3"|8 Wrecks |
||
| − | | rowspan="3"| |
||
|- |
|- |
||
|[[File:B2 Silver.png|20px]] $100,000 |
|[[File:B2 Silver.png|20px]] $100,000 |
||
| Line 85: | Line 83: | ||
|[[File:B2_Gold.png|20px]] $190,000 |
|[[File:B2_Gold.png|20px]] $190,000 |
||
| rowspan="3"|8 Wrecks |
| rowspan="3"|8 Wrecks |
||
| − | | rowspan="3"| |
||
|- |
|- |
||
|[[File:B2 Silver.png|20px]] $150,000 |
|[[File:B2 Silver.png|20px]] $150,000 |
||
| Line 94: | Line 91: | ||
|[[File:B2_Gold.png|20px]] $500,000 |
|[[File:B2_Gold.png|20px]] $500,000 |
||
| rowspan="3"|10 Wrecks |
| rowspan="3"|10 Wrecks |
||
| − | | rowspan="3"| |
||
|- |
|- |
||
|[[File:B2 Silver.png|20px]] $250,000 |
|[[File:B2 Silver.png|20px]] $250,000 |
||
| Line 103: | Line 99: | ||
|[[File:B2_Gold.png|20px]] $450,000 |
|[[File:B2_Gold.png|20px]] $450,000 |
||
| rowspan="3"|10 Wrecks |
| rowspan="3"|10 Wrecks |
||
| − | | rowspan="3"| |
||
|- |
|- |
||
|[[File:B2 Silver.png|20px]] $250,000 |
|[[File:B2 Silver.png|20px]] $250,000 |
||
| Line 112: | Line 107: | ||
|[[File:B2_Gold.png|20px]] $600,000 |
|[[File:B2_Gold.png|20px]] $600,000 |
||
| rowspan="3"|15 Wrecks |
| rowspan="3"|15 Wrecks |
||
| − | | rowspan="3"| |
||
|- |
|- |
||
|[[File:B2 Silver.png|20px]] $250,000 |
|[[File:B2 Silver.png|20px]] $250,000 |
||
| Line 121: | Line 115: | ||
|[[File:B2_Gold.png|20px]] $500,000 |
|[[File:B2_Gold.png|20px]] $500,000 |
||
| rowspan="3"|12 Wrecks |
| rowspan="3"|12 Wrecks |
||
| − | | rowspan="3"| |
||
|- |
|- |
||
|[[File:B2 Silver.png|20px]] $250,000 |
|[[File:B2 Silver.png|20px]] $250,000 |
||
| Line 130: | Line 123: | ||
|[[File:B2_Gold.png|20px]] $450,000 |
|[[File:B2_Gold.png|20px]] $450,000 |
||
| rowspan="3"|10 Wrecks |
| rowspan="3"|10 Wrecks |
||
| − | | rowspan="3"| |
||
|- |
|- |
||
|[[File:B2 Silver.png|20px]] $250,000 |
|[[File:B2 Silver.png|20px]] $250,000 |
||
| Line 139: | Line 131: | ||
|[[File:B2_Gold.png|20px]] $400,000 |
|[[File:B2_Gold.png|20px]] $400,000 |
||
| rowspan="3"|14 Wrecks |
| rowspan="3"|14 Wrecks |
||
| − | | rowspan="3"| |
||
|- |
|- |
||
|[[File:B2 Silver.png|20px]] $250,000 |
|[[File:B2 Silver.png|20px]] $250,000 |
||
| Line 148: | Line 139: | ||
|[[File:B2_Gold.png|20px]] $600,000 |
|[[File:B2_Gold.png|20px]] $600,000 |
||
| rowspan="3"|12 Wrecks |
| rowspan="3"|12 Wrecks |
||
| − | | rowspan="3"| |
||
|- |
|- |
||
|[[File:B2 Silver.png|20px]] $400,000 |
|[[File:B2 Silver.png|20px]] $400,000 |
||
| Line 157: | Line 147: | ||
|[[File:B2_Gold.png|20px]] $500,000 |
|[[File:B2_Gold.png|20px]] $500,000 |
||
| rowspan="3"|12 Wrecks |
| rowspan="3"|12 Wrecks |
||
| − | | rowspan="3"| |
||
|- |
|- |
||
|[[File:B2 Silver.png|20px]] $200,000 |
|[[File:B2 Silver.png|20px]] $200,000 |
||
| Line 166: | Line 155: | ||
|[[File:B2_Gold.png|20px]] $500,000 |
|[[File:B2_Gold.png|20px]] $500,000 |
||
| rowspan="3"|15 Wrecks |
| rowspan="3"|15 Wrecks |
||
| − | | rowspan="3"| |
||
|- |
|- |
||
|[[File:B2 Silver.png|20px]] $250,000 |
|[[File:B2 Silver.png|20px]] $250,000 |
||
Revision as of 14:47, 20 June 2013
| RETRO WRECK! | |
 |
This page containing information predating Paradise, Downtown (Burnout 3), is not complete.
If you can, please help Burnopedia by adding appropriate and relevant content here. |
|---|---|
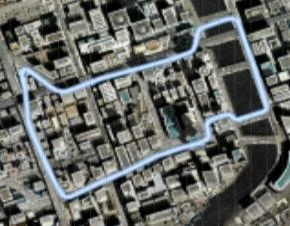
A map of Downtown
Downtown is a track in Burnout 3 and is based off of Chicago. It takes you through the streets of a busy city with bridges, a main street, and a section of elevated railroad with lots of pillars that can be extremely dangerous for beginner and veteran drivers alike. The pillars can also get you takedowns though, and can be useful for getting points on Road Rages.
Events
===Race Events
| Event | Direction | Type | Goal | Car Limits |
|---|---|---|---|---|
| Preview Lap 1 | Southbound | Preview Lap | Sports Type 3 | |
| Road Rage 1 | Southbound | Compact Series | ||
| Race 1 | Northbound | Compact Series | Tuned Compact | |
| Race 2 | Southbound | Muscle Series | ||
| Road Rage | Northbound | Muscle Series | ||
| Preview Lap 2 | Northbound | Preview Lap | Euro-Circuit Racer | |
Crash Events
| Event | Goal | Crashbreaker in |
|---|---|---|
| Cross Traffic | 8 Wrecks | |
| Demolition | 8 Wrecks | |
| Dead End | 10 Wrecks | |
| Wrecks City | 10 Wrecks | |
| Hate To Be Late | 15 Wrecks | |
| Hold Tight | 12 Wrecks | |
| Traffic Jammed | 10 Wrecks | |
| Bus Blockade | 14 Wrecks | |
| Grid Locked | 12 Wrecks | |
| Air Rage | 12 Wrecks | |
| Hit And Run | 15 Wrecks | |
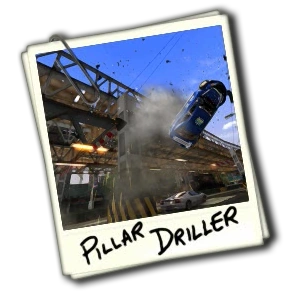
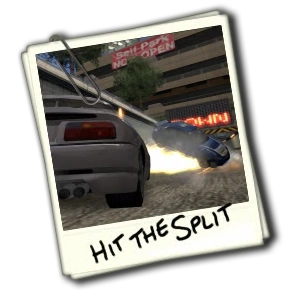
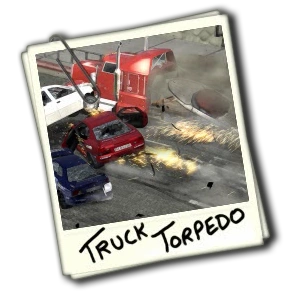
Signature Takedowns